Understanding Wood Slat Wall Benefits
Why Choose a Wood Slat Wall?
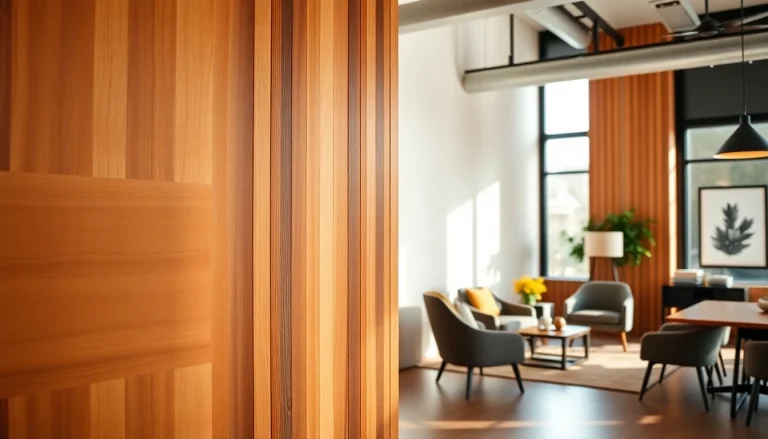
The contemporary design world is embracing the trend of wood slat walls for their multi-dimensional aesthetic and versatility. Homeowners, designers, and builders alike are drawn to their ability to elevate a space astonishingly. A wood slat wall can infuse warmth, elegance, and texture into any interior, providing an inviting atmosphere that instantly captivates. Choosing this feature can transform ordinary walls into stunning focal points, and its adaptability allows for implementation in various styles, from rustic to modern.
Functional Versatility of Wood Slat Walls
Beyond aesthetics, wood slat walls serve a functional purpose, contributing to acoustic performance in a space. The wood slats can help absorb sound, making them ideal for dining areas, offices, or any communal spaces where noise levels can rise. Additionally, these walls can act as a means to define areas within an open layout, subtly guiding the flow of conversation and activity. Moreover, they can provide a backdrop for shelving, artwork, or even indoor gardens, blending beauty with practicality.
Design Aesthetic and Visual Appeal
The visual appeal of wood slat walls cannot be overstated. They offer a unique way to add texture and depth to interiors, breaking up flat surfaces and creating an engaging visual experience. By varying the width of the slats or the spacing between them, designers can achieve a myriad of looks, from a sleek and modern feel to a more rustic charm. Mixing different wood finishes can further enhance the aesthetic, allowing for both contrast and cohesion depending on the desired style.
Materials and Tools for Your Wood Slat Wall
Best Wood Types for Slat Walls
Selecting the right type of wood is crucial for both aesthetic appeal and durability. Popular choices include oak, pine, and cedar. Oak is known for its strength and beautiful grain, making it a premium choice. Pine, being more cost-effective, offers a softer look and is easy to work with, while cedar is naturally resistant to decay, making it ideal for humid environments. When selecting wood, consider factors such as sustainability, grain patterns, and how well it complements your existing decor.
Essential Tools for Installation
Equipping yourself with the right tools will simplify the installation process of your wood slat wall. Essential tools include a miter saw or circular saw for cutting the slats to the desired lengths, a level to ensure even installation, a drill for mounting, and measuring tapes for precision. Additionally, a stud finder will help you locate the wall studs, ensuring the slats are securely anchored. Having these tools ready will make the project flow seamlessly.
Finishes and Treatments for Durability
To enhance the longevity of the wood slat wall, applying suitable finishes and treatments is critical. Clear sealants or stains can preserve the wood’s natural appearance while adding a layer of protection against scratches and moisture. UV-protective finishes prevent discoloration from sunlight exposure, making them essential in well-lit rooms. Regular maintenance and occasional reapplication of finishes will keep your wood slat wall looking fresh and vibrant.
Installation Process of Wood Slat Wall
Preparing the Wall Surface
Before installation, the wall surface must be properly prepared. Ensure the wall is clean, dry, and smooth. Patch any holes or imperfections, and if the surface is painted, sand it lightly to promote adhesion. If you are installing on drywall, using a level to ensure that your starting point is perfectly horizontal is crucial. This initial step sets the stage for a flawless installation.
Measuring and Cutting the Slats
Accurate measurements are vital when cutting the slats to size. Begin by determining the spacing you desire between each slat, which can range from zero to several inches apart. Utilize a measuring tape to mark the desired lengths on each slat, and then employ your saw to cut them. It’s beneficial to cut a few extras, as there’s always a chance of mistakes during the process. Take your time to ensure precision, as the visual consistency will impact the finished look.
Step-by-Step Installation Guide
- Start by marking a vertical line on the wall at your starting point using a level.
- Attach the first slat to the wall using your drill and screws. Ensure it is straight and secure.
- Continue attaching subsequent slats, checking the level regularly.
- For slats with spaces, adhere to your predetermined gap measurements before securing the next slat.
- Once all slats are secured, step back to review and make any necessary adjustments.
After installation, remember to fill any visible screw holes with wood filler and sand smooth for a polished look.
Maintenance Tips for Wood Slat Wall
Cleaning and Care Routine
To maintain the integrity and appearance of your wood slat wall, a regular cleaning routine is essential. Dust the surface weekly with a microfiber cloth to avoid buildup. For deeper cleans, use a damp cloth with a mild wood cleaner, avoiding harsh chemicals that can damage finishes. Occasionally inspect for any signs of wear or tear, which can often be addressed promptly before they escalate.
Recognizing and Repairing Damage
Over time, you may encounter scratches, dents, or discoloration on your wood slat wall. Minor scratches can typically be buffed out with a bit of wood polish. For deeper gouges, a wood filler can effectively conceal imperfections. If slats become warped due to humidity, replacing those sections may be necessary. Regular maintenance will help you easily spot these issues before they become serious concerns.
Long-term Upkeep Guidelines
Long-term care for your wood slat wall involves regular inspections to catch any signs of damage early. Applying a fresh coat of sealant every few years will help protect the wood from moisture and wear. Furthermore, maintaining a stable indoor humidity level can prevent warping or cracking over time. Following these guidelines ensures your wood slat wall remains a stunning feature for years to come.
Inspiring Wood Slat Wall Ideas
Creative Patterns and Layouts
Getting creative with the layout of your wood slat wall can amplify its impact significantly. Consider using an alternating pattern for an engaging look or playful spacing for a more modern twist. Vertical or diagonal slats can add motion to an otherwise static space. Layering slats at different depths can create a three-dimensional effect that’s sure to impress guests.
Wood Slat Walls in Different Spaces
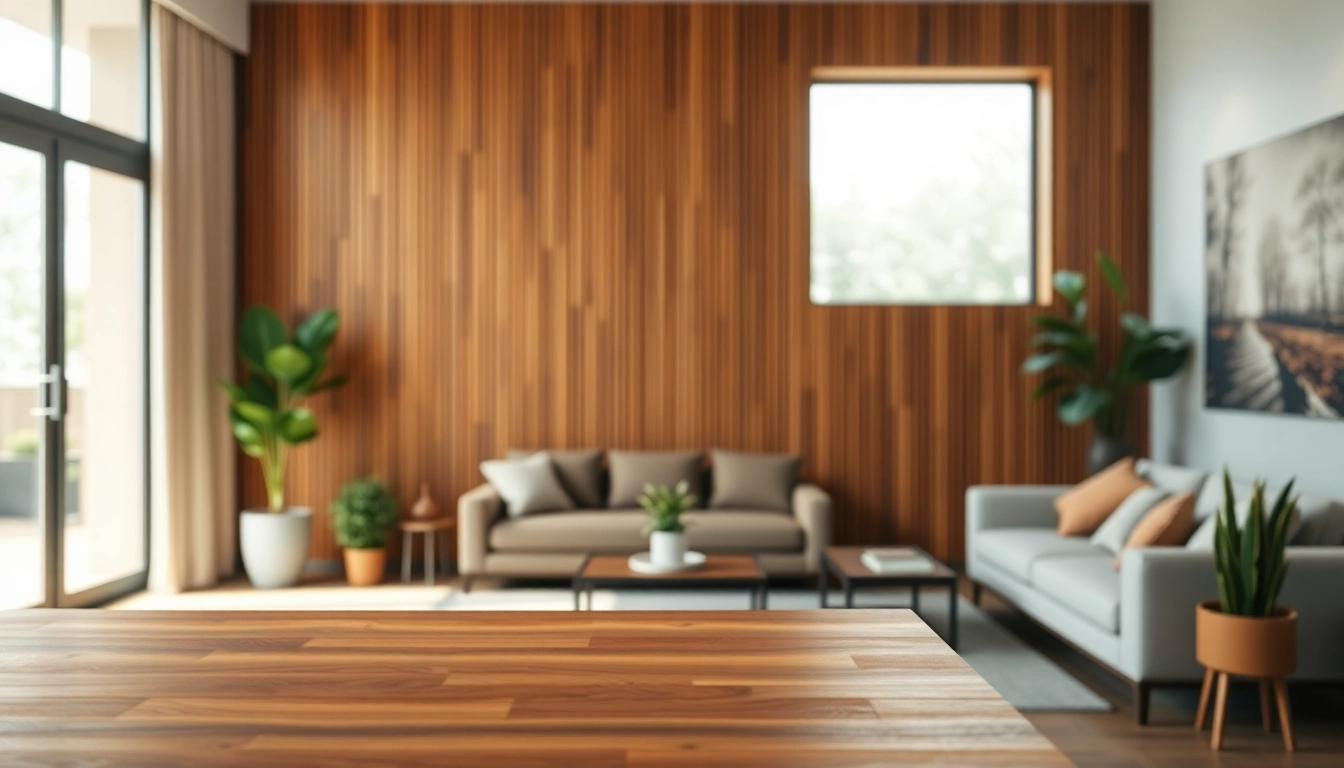
Wood slat walls fit seamlessly into various spaces, enhancing their charm. In living rooms, they can function as accent walls, complementing existing furniture. In bedrooms, they can serve as stunning headboards or behind bedside tables. Even in commercial spaces like restaurants and offices, wood slat walls can create inviting atmospheres that enhance customer experience or productivity.
Combining Colors and Textures
Combining colors and textures when designing your wood slat wall can create a unique aesthetic. Pair lighter wood slats with darker accents for a striking contrast, or integrate painted slats for a splash of color. Mixing different materials—like wood and metal—can also provide an intriguing interplay of textures that will captivate viewers and elevate your design.
Frequently Asked Questions
1. Can I install a wood slat wall myself?
Yes, with the right tools and careful planning, installing a wood slat wall can be a DIY project.
2. What maintenance is required for a wood slat wall?
Regular dusting, occasional cleaning, and inspecting for damage will help maintain the wall’s appearance and structure.
3. Can I use reclaimed wood for my slat wall?
Absolutely! Reclaimed wood adds character and is an eco-friendly choice for your wood slat wall.
4. How do I choose the right wood finish?
Consider the room’s lighting and desired appearance; matte, satin, and gloss finishes each offer distinct looks.
5. Is wood slat wall suitable for outdoor use?
It’s best used indoors unless treated for outdoor exposure; moisture can cause damage without proper finishing.